Homeowners

Seeing Spots in Your Yard?

Source: Lawn Doctor of Chattanooga

Source: Lawn Doctor of Chattanooga

Get tips for preventing brown patches in your lawn

This summer’s weather has been hot and humid, a perfect recipe for Brown Patch Disease in local lawns. Fescue grass prospers when it’s 65-75 degrees, so fescue is especially vulnerable to the fungus that causes Brown Patch Disease when the temperature rises and grass stays moist. Fortunately, there are steps you can take to keep your grass healthier (and greener!) this summer.

We talked with Renata Clark at the Lawn Doctor of Chattanooga and learned these tips for preventing brown patches in your yard:

Photo by Anthony Rossbach on Unsplash

change your watering routine

IF THE GRASS STAYS WET, YOU’RE INVITING FUNGUS TO DEVELOP.
  1. Water your lawn in the morning, and never water after 3 p.m. You want to give the grass plenty of time to dry out again after being watered.

  2. Water 20-30 minutes per zone, but water less frequently than you would in drier weather. Don’t water every day.

  3. Check for pooling or drainage problems. Any spot in your yard that stays moist can be a breeding ground for fungus.

Photo by Daniel Watson on Unsplash

mowing: less is more

IF YOU CUT FESCUE GRASS TOO SHORT, IT WON’T SURVIVE THE HEAT OF SUMMER AND WILL TURN BROWN.
  1. Mow the grass as high as you can, and mow less often.
  2. Don’t mow when the grass is wet.
  3. Mow every 2-3 weeks.

If the brown spots have already taken over, contact the Lawn Doctor for help! They can treat the fungus once it has started growing in your yard. They also offer a preventive fungus application during May and June, so put a treatment on your calendar now for next spring.

For more lawn care tips, read 5 Tips for a Beautiful Lawn this Spring, or visit the Lawn Doctor of Chattanooga online.

WE HOPE THESE IDEAS AND TIPS ARE INSPIRATIONAL. PLEASE CALL ME WITH ANY OF YOUR HOME BUYING OR SELLING NEEDS AND QUESTIONS. (423-421-9192)

Is My Wedding Ring Covered by My Homeowner’s Policy?

wedding ring photo by chuttersnap on Unsplash

To find out the answer to this question, I talked to Keith Rocha at The American Insurance Group. His answer, by the way, is “Maybe.”

General Homeowner's Policies

According to Keith, “Most home policies have property limits on certain specialty items like jewelry, guns, art and other valuables.” He said typical policies may provide up to $2,500 for those special items. That’s $2,500 for ALL of those items, not per piece, so it’s clearly not enough protection against loss of your most precious possessions. Additionally, the coverage provided for jewelry on a homeowners policy is limited, meaning the policy might cover jewelry lost in a fire but not jewelry that is stolen or simply lost.

Related: Should You Insure Your Home for Purchase Price or Replacement Cost?

Personal Articles Floaters

bridget-flohe-339785-unsplash.jpg

To provide adequate coverage for these higher valued items, Keith says the safest bet is to “schedule” the items on a personal articles floater. You can purchase a personal articles floater as either a separate policy or as a rider added to your homeowners policy, depending on which insurance carrier you use.

A personal articles floater allows you to insure your wedding ring and other valuable items at their full values. Ideally, for the broadest coverage, jewelry should be scheduled, or itemized, on an inland marine/personal property floater. This can provide all-risk coverage, which means your ring and other scheduled valuables are covered for any risk that’s not explicitly omitted in the policy.

What You’ll Need

Some insurance carriers provide blanket coverage, but in most cases, you’ll need to provide an appraisal and/or bill of sale documenting your ring and its worth. It’s also smart to take pictures or video footage of your wedding ring and other insured valuables. Keep those visuals somewhere safe, along with your appraisal and proof of purchase, so you’ll have everything you need to make a claim.

WE HOPE THESE IDEAS AND TIPS ARE INSPIRATIONAL. PLEASE CALL ME WITH ANY OF YOUR HOME BUYING OR SELLING NEEDS AND QUESTIONS. (423-421-9192)


Gail+Jenkins.png

How to Choose Tile for Your Home

How to Select Tile for Your Home

When it comes to picking tile for your home, your options are virtually limitless and quite possibly overwhelming! That’s why having an expert walking you through the process can ensure you end up with a look that you love. I talked with Sarah Lauletta, interior designer at Louisville Tile Chattanooga, who shared pointers about how to select tile for your next home project.

Bath-Shower-Tile.jpg

Set the Scope

Decide where you need new tile. It seems easy, but make a list of all the places you want new tile, like flooring, walls, showers, and your kitchen backsplash. For example, are you redoing a single shower or an entire kitchen? The size and complexity of the work you’re doing will definitely impact the cost of the work and materials.

Know Your Allowances

Work with your contractor to make sure you have a solid understanding of your overall project budget. Even better, find out what specific allowances your budget includes for tile. Ideally, before you start picking out tile, you’ll know exactly how much has been budgeted for the tile and any related costs. If your budget isn’t that detailed, you can arrive at a close estimate by knowing the square footage of the space and your project budget to arrive at the price per square foot.

Related: 5 Mistakes People Make When Remodeling Their Kitchens

Marine-Fog-Shower-Tile.JPG

Pick a Palette

...or bring in a piece of your countertop. It’s much easier to make a tile selection when you have a focal point or focal color to work with. And it’s not just the color that matters. For example, if your countertop has a busy design that’s full of movement, you’ll want your tile more muted, so the countertop won’t lose its wow factor. Or if your counter is a solid slab of cement, your tile can add a punch of color or pattern to your room.

Related: 4 Ways to Keep Your Countertops Looking Like New


Choose Your Tile and Pattern

This is the fun part! Now that you know exactly what rooms or spaces you’re tiling, how much you can spend on each space, and you’ve thought about the color and style of tile you’d like, you get to hit the showroom floor. By bringing in pictures of rooms, patterns, and tiles that you like, you’ll make the process even easier, and you’ll be more likely to end up with a finished look that you love. If you’re remodeling, bring pictures of the rest of your house, so you can update your space without losing the character or overall style of your home.

Salad-Pebble-Shower-Tile.JPG

Related: 4 Tips on Choosing Fixture Finishes

This is where a professional can really help you, because they’ll know what extra trim pieces you might need and can offer suggestions about tile patterns and accents to give your room the polished look you want. A pro can even make recommendations for paint colors, faucets, light fixtures and finishes, cabinet pulls and other details to finish out your project.

(Photos courtesy of Louisville Tile Chattanooga)


WE HOPE THESE IDEAS AND TIPS ARE INSPIRATIONAL. PLEASE CALL ME WITH ANY OF YOUR HOME BUYING OR SELLING NEEDS AND QUESTIONS. (423-421-9192)

Gail+Jenkins.png

5 Tips to Organize Your Guest Room & Welcome Your Visitors

5 tips to organize your guest room

Whether family is coming in for the holidays or a friend is just passing through town, it’s easy to embrace your hospitality skills and make your guest room warm and comforting.

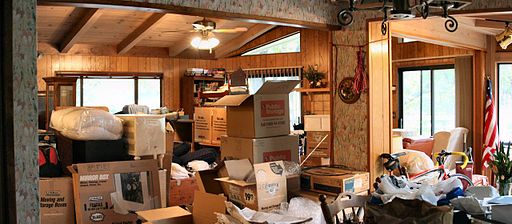
1. Eliminate the clutter…

Sure, clutter says, “Hey, I’m at home in my mess, and I invite you to feel at home, too.” But there’s a difference between making things homey and letting it all hang out.

First, go area-by-area in your guest room to remove things that don’t serve your needs, or at least your needs for the guest room. Donate old toys and clothes that have been stored for too long, recycle out-of-date magazines, and relocate (or let go of) half-finished hobby projects.

Next, consider clearing out overly delicate, fiddly, or fragile items, or move them out of reach to minimize your guests’ worries they might knock something over.

2. …But don’t feel like your guest room has to be sparse.

Your guest room doesn’t have to have as much white space as a museum. If you use your guest room closet for a gift closet or to store your off-season clothing, there’s no reason to revamp. Just make sure that there’s adequate closet or drawer space for your guests to hang or store what they bring. Chances are, they won’t be staying longer than a week, so don’t overestimate how much space they’ll need. Three dresser drawers should do it.

Make sleeping the priority, and make the bed with fresh (and matching) sheets, blankets, comforters, and a bedspread. Invest in a few different types of pillows – down and foam – in case your guests have allergies.

3. Shed a little light on the subject.

Even if you have overhead lighting in your guest room, keep at least one bedside lamp for reading. (If your guest bedroom has a queen or king bed, opt for two lamps.)

Have a nightlight, preferably one with a light sensor or motion sensor, so it’s not necessary to turn it on or off.

Install blackout curtains or vertical blinds so your guests can luxuriate in darkness while sleeping.

4. Don’t make your guests guess.

Anticipate questions your guest may have. Print (and perhaps laminate) an index card with:

  • the Wi-Fi network name and password
  • your security alarm code (and how it works)
  • your address & landline number (in case they order pizza or must call 911)
  • the location and instructions for adjusting the thermostat
  • where to find extras (toilet paper, pillows, towels, blankets, aspirin)

Display a few small dishes or decorative trays so guests know where it’s safe to put jewelry, eyeglasses, and phones within easy reach.

Alarm clocks are still a nice touch. Many people below a certain age will use their cell phones, but it can be comforting in a strange space to have an alarm clock, preferably one that doesn’t tick noisily or glow too brightly.

5. Make your guest room homey, and then add the amenities of a spa.

Attach a full-length mirror to the back of the bedroom or bathroom door, or lean it against the wall.

Install over-the-door valet hooks or removable 3M Command hooks on the reverse of the bedroom or bathroom door to easily hang clothing or robes. Keep a variety of nice hangers in the closet. (Quoting Joan Crawford: “No more wire hangers!”)

Set out a tray with a few water glasses or coffee mugs so guests need not traipse to the kitchen for a drink of water. Consider filling a pretty glass carafe with ice water before bedtime.

Keep a small wastebasket with a new liner near the bed. If you think guests might be nervous about using a too-tidy basket, crumple up one small piece of paper and (like a grocery list) and toss it in, so your guest knows it’s not just for show.

On a desk or bedside table, create convenience for your guests.

  • Create a charging station for multiple gadgets with a multi-port USB hub/charger.
  • Pile some non-controversial books – a few cozy mysteries, a book of short stories – in case your guests can’t sleep.
  • Put out a box of tissues.
  • A few tourism brochures – you can usually pick them up at the mall or tourism office – help your guests think about what they might want to do while visiting.

In your guest bathroom, treat guests to a basket of extras: new toothbrushes, mini-toothpaste & mouthwash containers, floss, and tiny bottles of shampoo, conditioner, and moisturizer. Leave a hair dryer hanging from a small hook or handy in a tidy organizer.

Julie Bestry is a Chattanooga-based Certified Professional Organizer, speaker, and author who helps individuals and businesses save time and money, reduce stress, and increase productivity through new organizational skills and systems. For information on how Julie can turn your chaos into serenity, visit her at Best Results Organizing.
 

WE HOPE THESE IDEAS AND TIPS ARE HELPFUL. PLEASE CALL ME WITH ANY OF YOUR HOME BUYING OR SELLING NEEDS AND QUESTIONS. (423-421-9192)

Gail+Jenkins.png

Draft-Proof Your Windows for Winter

Draft-Proof Your Windows for Winter

One drafty window is a little like pulling one brick away from your house. Imagine pulling out a brick for every leaky window, and suddenly, it’s like have a window (or several!) wide open in the middle of winter. That’s the example Donald McKenna, owner of McKenna Exteriors, offered when talking about the importance of sealing up drafty windows for winter.

He mentioned health concerns, too. Older aluminum windows, especially, are prone to sweating, which allows mold and mildew to grow around the window frames. Wooden windows shrink and swell with changes in the weather. They, too, can let in unwanted air and moisture that rot the wood or invite mold and mildew to take hold. Left unchecked, mold and mildew can make their way into the sheetrock of your home, which holds moisture and compounds the problems.

So what can you do about rattling, sweating, drafty windows? McKenna recommends these steps:

LATCH YOUR WINDOWS

It sounds obvious, but sometimes we don’t realize our windows are unlocked. When windows are unlatched, they have a tendency to inch up, inviting air and moisture into the house.

CLOSE DRAPES AND BLINDS

This is an all around good energy-saving move. Window treatments provide physical barriers to cold air and wind, blocking that icy air from entering your home. You can also find shrink-film insulation products at home improvement stores that stick onto your windows, sealing them from drafts.

REPLACE YOUR WEATHER STRIPPING

Each year, check the weather stripping on your windows and replace any that looks worse for wear. While you’re at it, check for rotting wood, mold or mildew, and other signs that your windows need some routine maintenance.

CLOSE STORM WINDOWS

Walk around outside to make sure your storm windows are all closed. Also do a check to see if they’re caulked all the way around.

REPLACE YOUR WINDOWS

If you’ve taken all these precautions but still have drafty windows, it may be time to install new windows. McKenna suggests talking with an expert to determine which product is best for your home. They’ll take into consideration issues like your budget, your home’s style, your neighborhood’s design requirements, and the problem you’re looking to solve. From there, they’ll help you select the best windows for your home.


WE HOPE THESE IDEAS AND TIPS ARE HELPFUL. PLEASE CALL ME WITH ANY OF YOUR HOME BUYING OR SELLING NEEDS AND QUESTIONS. (423-421-9192)

Gail+Jenkins.png

Should You Insure Your Home for its Purchase Price or Replacement Cost?

Should You insure Your Home for its Purchase Price or Replacement Cost?

Knowing how much insurance coverage to buy for your home is harder than you expect. Should its insured value be the same as what you paid for it?  Keith Rocha, an insurance agent with  the American Insurance Group, said he frequently talks to homeowners who are unsure about the level of coverage they need. This is a question he hears often:

Should I insure my home for the purchase price?

Keith says the answer is usually no. Instead, he recommends you insure your home for the cost of rebuilding or repairing it, not for the amount you paid to buy it. These situations demonstrate why replacement cost is the better measure than market price:

When Land Costs are High

In some markets, the market value of land can be quite high. In those situations, the cost of the land makes the purchase price higher than what the replacement cost would be. You’d be over-insured if you covered the house at its purchase price, because your rates would be based on the land value, not the replacement cost to repair or rebuild the structure.

When the Market is Depressed

When housing inventory is high, there’s less competition from buyers, and prices drop. In that situation, you may be able to buy a house at a price that’s much less than you would spend to replace the structure.  Keith says, “In a depressed market, when deals are abundant, you can often buy homes for dramatically less than the cost to build the same house.” In that case, you’d be underinsured if you only protected the house for its purchase price.

One of Keith’s clients could have easily found himself in this situation. In a depressed market, he paid about $100,000 for a nine-unit apartment complex and put another $100,000 into renovations. A year later, he suffered a total loss of the building. Fortunately, he had insured it at its replacement cost - not the purchase price - and received $425,000 to completely rebuild the complex. His only payment out of pocket was the insurance deductible.

When You Buy a Foreclosure or a Fixer-Upper

Similar to the situation above, you may get a great deal on a home that needs plenty of TLC or gets auctioned on the courthouse steps. But if the home should burn down, the replacement cost would be significantly higher than what you paid to buy the house in the first place. Again, you’d be underinsured in the case of an emergency.

Regardless of the type of market you are in, your home should always be insured at the amount it would cost to rebuild. That way, you’ll be better able to restore or rebuild your home to its former condition.

One way to determine the replacement cost of your home is to ask a local realtor the average cost per square foot to rebuild in your area. Do the math, and don’t forget to include special features in your home, like custom woodworking, or marble floors, that would drive up the replacement price if you needed to repair or replace them.

Replacement costs can change over time, so it’s also a good idea to review your policy on a regular basis to make sure your coverage is keeping pace with inflation and other factors influencing the local market. Remember, too, to make sure you have adequate insurance coverage for everything inside your home - artwork, jewelry, furniture, clothing and your other possessions.

WE HOPE THESE IDEAS AND TIPS ARE HELPFUL. PLEASE CALL ME WITH ANY OF YOUR HOME BUYING OR SELLING NEEDS AND QUESTIONS. (423-421-9192)

Gail Jenkins

5 Mistakes People Make When Remodeling a Kitchen

The modern kitchen is the heart of the home. Whether it’s Saturday night or Tuesday morning, it’s the busiest room in your house (and has the heftiest price tag during a remodel). We asked Jackie Howard of Scarlett’s Cabinetry for her expert advice so that you won’t make these common remodel mistakes.

source: houzz

source: houzz

1. Forget the triangle – get in the zone!

Modern kitchens are bigger than ever so it’s helpful to think of “work zones” instead of the “triangle” design concept (keeping the stove, sink and refrigerator within 4-9 feet). Consider at least 2 prep areas, each with their own sink, disposal, and trash can. Large islands with lots of counter space or banquettes can multitask as seating or prep areas. Just be sure you have everything you need for your zone, like baking trays near the oven and skillets/spices near the stove. “My goal is always to design a kitchen to ensure there is ample space for everyone to join in and help prepare family meals,” says Jackie.

Related: How to Choose Tile for Your Home
 

source: houzz.com

source: houzz.com

2. Don’t overlook appliance innovations

“The new steam ovens allow you to cook fast and healthy – it’s the new ‘must have’ appliance,” says Jackie. Wolf has created one that can steam, bake, roast or slow cook. Combining steam and convection, it can defrost meat, perfectly roast ribs or steam cook an entire meal of fish, vegetables and rice. Also consider under counter refrigeration, which can be essential for keeping the work zone concept practical. You can store produce near a second sink for a salad/vegetable prep station, or drinks if room allows for a third bar area zone. 


source: houzz.com

source: houzz.com

3. Don’t keep the cabinets

If budget allows, you’re better to replace dated cabinets. At the very least, consider adding a few modern innovations such as appliance garages and mini pantries. Appliance garages allow you to keep things like your mixer, blender, microwave or coffee maker on the counter without visual clutter. Have the top of the “garage” be approximately your height with bi-fold doors so they’re not obtrusive when open. Mini pantries allow you to store things like olive oils, vinegars and spices near the stovetop. 

source: houzz.com

source: houzz.com

Related: 4 Tips on Choosing Fixture Finishes

4. Put the freezer on ice

“The freezer is the least used appliance in your kitchen and should not be in the middle of a major work triangle,” says Jackie. She recommends moving outside the kitchen, to an adjacent pantry or utility room. There are many refrigerator only options on the market that allow you to do a separate full-sized freezer elsewhere.


source: houzz.com

source: houzz.com

5. Don’t keep spices in the top drawer

While Jackie recommends keeping spices in a drawer for freshness, she likes to use a second drawer with tilted insert. “A top drawer is typically too shallow for the larger spice containers we use,” she says. “A middle, taller drawer allows various sizes to be stored together – even your baking powder and baking soda fit.” Some people also opt for a tall, pull-out drawer. 
 

source: houzz.com

source: houzz.com

WE HOPE THESE IDEAS AND TIPS ARE INSPIRATIONAL. PLEASE CALL ME WITH ANY OF YOUR HOME BUYING OR SELLING NEEDS AND QUESTIONS. (423-421-9192)
 

5 Ways to Know if Bellhops is Right for You

If a new house is part of your New Year, you need to know about Bellhops. Often referred to as the “Uber of moving,” Bellhops is roughly half the cost of traditional moving companies. But their unique service isn’t for everyone. Here are 5 ways to know if this next-gen mover is right for you.

1.    You’re working on a tight timeframe

Maybe you enjoy the soothing sounds of on-hold music, or waiting for a call back from a company. If not, you’ll appreciate Bellhops’ online instant booking feature. Rather than wait for a slow-turn moving quote, you simply plug in all your information on the website and receive a quote right on the spot. 

2.    You’re planning a small-scale move

If you live in a 5-bedroom house filled with precious antiques, Bellhops isn’t for you. (They can’t insure or move pianos, antique furniture, and other highly valuable items.) While they specialize in bungalow, condominium or apartment moves, you can still take advantage of serious cost savings. In the greater Chattanooga area, Bellhops offers labor-only moving help (you supply the truck) as well as full-service moves (they supply both the labor and the truck). You can choose the service based on your specific needs. 

Related: 5 Ways to Make Your New Home Your Own

3.    You appreciate clean-cut, energetic and optimistic movers

Every ‘bellhop’ must be currently enrolled in college and is hand-picked for their work ethic and optimism. Much like Uber, ‘bellhops’ claim the jobs they want when it works with their schedule. Bottom line, they want to be there and their enthusiasm shows. 

4.    You’re not moving but still need a helping hand

Doing a little redecorating for the New Year? Opt for the “In-Home Move” option for help rearranging furniture or “moving” items from the attic to the dump! Simply tell them how many bellhops you need, for how long and when and help is on its way. 

5.    You want highly rated movers

Bellhops has a 4.8 out of 5 rating on Google and 5 star ratings on Yelp. Customer comments includes things like, "I can't recommend them highly enough!", "They exceeded my expectations!" and "THIS IS THE BEST MOVING COMPANY EVER!!"


WE HOPE THESE IDEAS AND TIPS ARE INSPIRATIONAL. PLEASE CALL ME WITH ANY OF YOUR HOME BUYING OR SELLING NEEDS AND QUESTIONS. (423-421-9192)


Gail-signature.png

4 Ways to Keep Your Counters Looking Like New

photo credit: Stone Source, Inc.

photo credit: Stone Source, Inc.

The holidays are here, which means you’ll want squeaky clean countertops for all those house guests. We caught up with Anna Baker of Stone Source for some easy tips on keeping your countertops looking like new, whether they’re Carrara or Quartz.


1. Know Thy Stone

Before you can clean it, you have to understand it. There are basically two categories in solid surface countertops: (1) marble; (2) everything else. 

MARBLE is a carbonate, which means anything acidic like lemons or even tomatoes will eat away a tiny bit of the surface, creating dull spots known as etches.

Other surfaces such as QUARTZ and GRANITE are tough enough to withstand more aggressive cleaners. If you like a streak-free clean, you can even use ammonia-based sprays such as Windex. 

While less common, SOAPSTONE and LIMESTONE are natural stone choices that require similar cleaning and maintenance than marble (although they both better resist heat damage).

Related: 4 Tips on Choosing Fixture Finishes
 

 2. Clean Smart

The easiest, safest, and most effective cleaning method for your kitchen counters is warm dish soap + warm water, says Baker. A bit of mild soap in a sink works great for everyday cleaning. If you prefer the spray-on/wipe-off method, mix water and dish soap in a spray bottle. Spray on your counters, wipe with hot, wet dish cloth and dry with a towel. (See recipe here) You can also buy specially formulated sprays for your type of stone, just be sure it’s pH neutral, she warns.
 
If you have marble, wipe up spills as soon as they occur to minimize etching and avoid citrus scented cleaners because of the acidity. Other surfaces such as granite can handle stronger cleaners, but never use bleach on quartz.
 

3. Watch overspray

If you have marble or another natural stone, be careful of the overspray from sink bowl or glass cleaners. Spray those cleaners directly on your rag or sponge, away from your countertop.

Related: How to Choose Tile for Your Home 
 

4. Remove etches or scuffs

Many people will tell you etches are a part of life with marble. While everyone differs on their tolerance for countertop imperfections, it’s a myth that your only option is to suck it up and live with it. “A stone professional is your best bet for removing any type of damage, but there are some DIY methods for minor issues like etching or scuff marks,” says Baker. “There are products available called water ring and etch removers that you can use with a white nylon scouring pad to buff out any light etching. It just takes patience and a little elbow grease.”

WE HOPE THESE IDEAS AND TIPS ARE INSPIRATIONAL. PLEASE CALL ME WITH ANY OF YOUR HOME BUYING OR SELLING NEEDS AND QUESTIONS. (423-421-9192)

Gail-Jenkins.png

5 Ways to Make Your New Home Your Own

Whether you’ve chosen a diamond in the rough or a move-in ready house, personalizing your new space will make it feel like home faster. We sat down with interior designer Hannon Kirk Doody of Hannon Douglas for her 5 simple steps for making your new home your own.

1.    PAINT

If remodeling isn’t in your budget, consider the transformative power of paint. Paint is the quickest and most cost effective way to start fresh, says Hannon. Painting a room white creates a blank canvas to highlight your furniture and fixtures, while a bold color can completely change the dimension of a room. She suggests an eggshell finish on walls to help hide those bumps and bruises that come with the wear of an older house.

2.    LIGHTING

If your new space is looking dated, come to the light. Light fixtures define a home’s style more than you may realize. One easy upgrade is the dining room chandelier, which is a simple switch for any electrician (or a handyman could handle for less money). Just be aware of proportions. “A mistake we see often is when the scale of the fixture is off— in this case bigger is better,” says Hannon.

Related: 5 Ways to Hang Art Like a Pro

3.    CARPET

It’s hard to make a fresh start with stains. More times than not when moving into a new home there is carpet in bedrooms that needs to be ripped out and replaced. “We recommend going back with a solid, low pile, neutral,” says Hannon. “We also encourage our clients to add hardwood when able because the life expectancy is much longer and provides a greater value to the home.”

4.    CABINET HARDWARE

Changing cabinet hardware in your kitchen or bath is a DIY project almost any homeowner can handle. Brass is back in a big way, and this is a fun way to incorporate it in your new home. Don’t worry if you have a stainless or nickel faucet; we love the look of mixed metals,” says Hannon.

Related: 5 Ways to Make Your Housewarming a Hit

5.    LANDSCAPING

Your yard is your home’s first impression – gnarly bushes and weedy flowerbeds don’t make a good one. “Landscaping is very important because it’s the finishing touch that makes the home feel complete,” says Hannon. “Clean out old garden beds, put in new pine straw, and plant flowers that you love to see every day.”

Related: 5 Tips for a Beautiful Lawn

WE HOPE THESE IDEAS AND TIPS ARE INSPIRATIONAL. PLEASE CALL ME WITH ANY OF YOUR HOME BUYING OR SELLING NEEDS AND QUESTIONS. (423-421-9192)

Gail-Jenkins.png

4 Tips on Choosing Fixture Finishes

If you’ve never renovated a kitchen or bathroom, you probably haven’t lost sleep over the benefits of satin brass vs stain bronze. It may seem like minutiae, but coordinating hardware finishes can be a real headache in “heavy metal” rooms like bathrooms and kitchens. Door knobs, drawer pulls, light fixtures, even mirror finishes must all coordinate. And they’re called “fixtures” for a reason – these semi-permanent decisions are something you’ll want to love for years to come.

If fixture finishes have your head spinning, relax. Interior designer Michelle Workman has the answer – mix metals. When done properly, it can create a balance in your interior that will feel natural and storied, she says. Here are 4 tips on mixing metals like a pro.

1. Consider both warm and cool tones

Don’t paint yourself into a corner. Not only can you mix metals within one room, but every fixture in your new bathroom doesn’t have to perfectly coordinate with the rest of your home. Mixing metals allows you to experiment with the tonal qualities of metals (polished vs matte) and the feeling one gets from using a cool (silver toned) or warm (gold or copper toned) metal, says Workman.

Related: How to Choose Tile for Your Home

2. Practice restraint

Don’t mix more than three metals in one space. In a recent kitchen (top picture) Workman used brass and stainless, with a pop of copper to create more depth to the color story, she says. The La Cornue stove, which has both brass and stainless elements serves as the focal point of the room, with the pots above being the only place she used copper. This kept it from becoming “visually erratic,” she says. The brass hardware adds warmth to the cool toned cabinetry, carrying the cool/warm mixture throughout the space. 

3. Keep a theme

Don’t mix more than three metals in one space. In a recent kitchen (top picture) Workman used brass and stainless, with a pop of copper to create more depth to the color story, she says. The La Cornue stove, which has both brass and stainless elements serves as the focal point of the room, with the pots above being the only place she used copper. This kept it from becoming “visually erratic,” she says. The brass hardware adds warmth to the cool toned cabinetry, carrying the cool/warm mixture throughout the space.

Related: 5 Mistakes People Make When Remodeling a Kitchen

4. Try a little at a time

If mixing metals scares you, try a little bit at a time. In this kitchen Workman again used a La Cornue stove with brass and stainless mixed together, but the rest of the metals were kept in silver tones. She mixed both polished nickel and brushed stainless steel to keep it visually interesting.

WE HOPE THESE IDEAS AND TIPS ARE INSPIRATIONAL. PLEASE CALL ME WITH ANY OF YOUR HOME BUYING OR SELLING NEEDS AND QUESTIONS. (423-421-9192) 

Gail-Jenkins.png

5 tips to Save Money and Stress When Moving

5 tips to Save Money and Stress When Moving

Moving ranks at the very top of life’s “most stressful moments” list. If you’re facing relocation, Anne-Elizabeth Youmans of Elizabeth’s Moving & Storage has 5 tips that will help make the process smoother (and less expensive).

1. One word: PURGE

Embrace the recent minimalist trend and say goodbye to clutter before you pack boxes. A common qualifier is asking, “Will I use this in the next 12 months?” Or you can employ famed Tidying Queen, Marie Kondo’s question, “Does this bring me joy?” If the answer is no, let it go. Even heirlooms should be on the chopping block. Do you really want to move a 200-pound armoire that has never matched your taste just because it belonged to your great-grandmother? If you need inspiration, try minimalist Courtney Carver’s bemorewithless.com blog. Marie Condo also has a new book – Spark Joy – that has in-depth advice on packing and moving.

2. Start packing ASAP

Allow 2 to 3 weeks for purging and packing, says Youmans. Never underestimate how much time (and tissue paper) it takes to safely wrap your breakables. As soon as you sign your closing documents, start boxing up anything that isn’t necessary for daily living. Wall art, books and shelf knick-knacks are a great place to start. Your kitchen will also take far longer than you can imagine. Set aside only the absolute essentials – a few pots and pans, minimal dishes, etc. – and start putting everything else in a box.   

Related: 5 Ways to Make Your New Home Your Own

3. Call the movers post-purge

Get quotes from moving companies after you've gotten rid of unwanted items – your quote will be much lower. If you had trouble with #1, think of the money you’ll save after decluttering. Need any more inspiration to Craigslist Granny’s purple and gold china?

Related: 5 Ways to Know if Bellhops is Right for You

4. Have a furniture game plan

Measure your new space and make sure everything will fit where you’re planning to put it. This may affect key decisions on how they load the truck, and you’ll certainly save time (i.e. money) if you’re not having the movers rearrange furniture that doesn’t work where you thought it would.

5. Take a deep breath

Rome wasn’t built in a day, and your new home will take some time to adjust to, says Youmans. Expect things to be upside down for a while. It's part of the process and a new beginning!

WE HOPE THESE IDEAS AND TIPS ARE INSPIRATIONAL. PLEASE CALL ME WITH ANY OF YOUR HOME BUYING OR SELLING NEEDS AND QUESTIONS. (423-421-9192)

Gail-Jenkins.png