Choosing the Right Rug for Your Space

Photo by Vecislavas Popa from Pexels

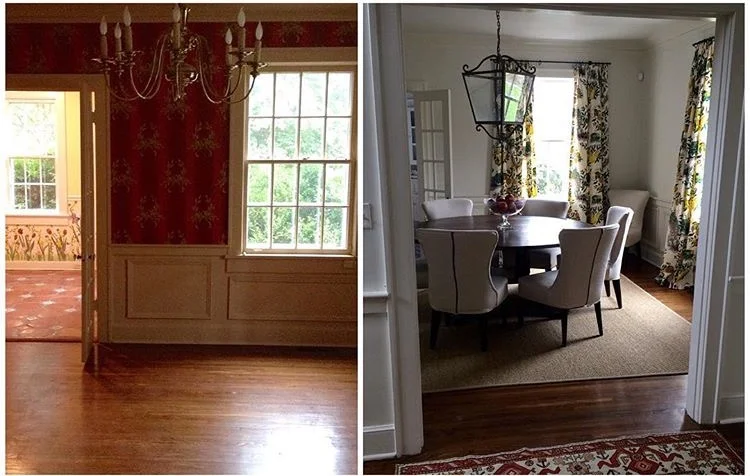
So often, when it comes to buying rugs, we head to the store, flip through the racks, and stop when we find a color or pattern we like in a rug that’s the right size.

Ginger Kachline, Master Rug Cleaner and owner of Interior Care, Inc., says, “That’s one way of doing it, but buying a rug is an investment in your home. You want to make sure you’re getting the right one for your living space. Ideally, you want to start with the rug and decorate around it, like an artist with a clean canvas.” But that’s not always possible. When it comes to choosing the right rug for your space, she suggests you look at much more than the size and color.

First, think about where the rug will go:

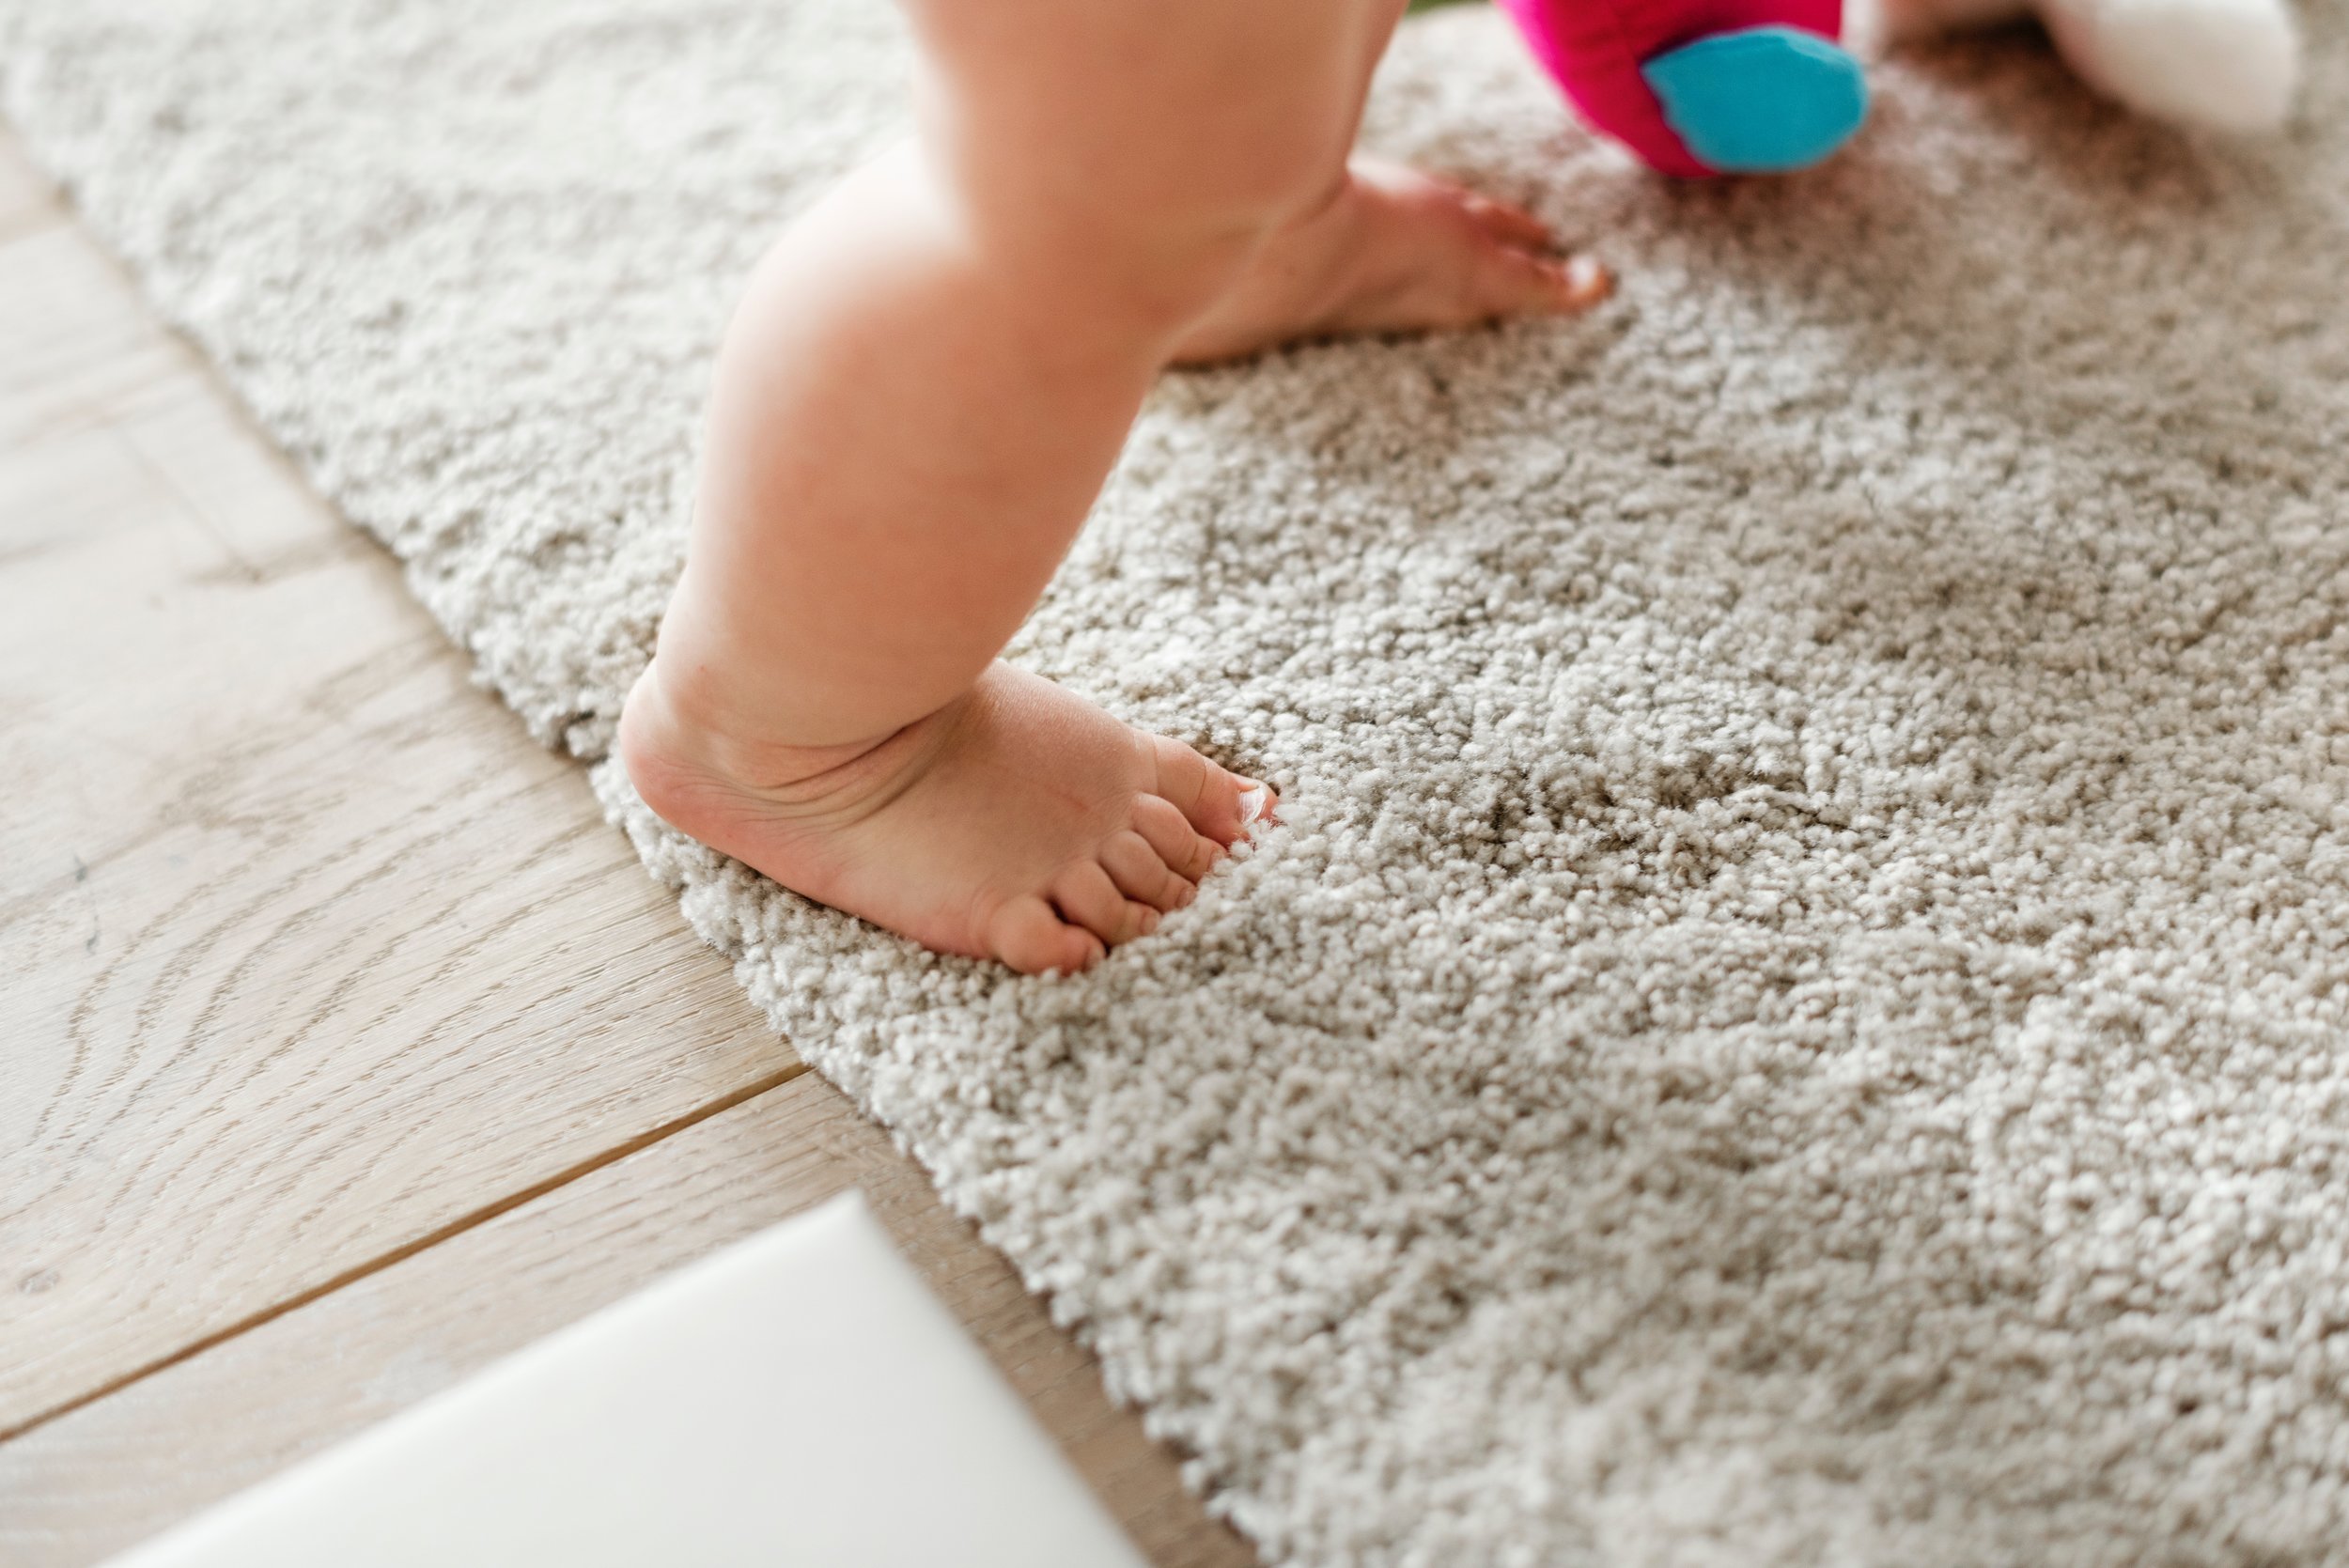
  • Will there be heavy foot traffic, or is there a possibility of spills and stains?

  • Do you have pets that could have accidents on the rug?

  • Will it sit on hardwood floor, tile, or something else?

  • Will you set heavy furniture on it that could leave lasting marks in the fibers?

  • Or is there a someone in the family who is disabled or aging and could be at risk of tripping over a thick rug?

Understanding what you need out of a rug will help you pick one with the right fiber content, construction and comfort for your room.

Fiber Content

There are many kinds of fibers used in rugs. Natural fibers include wool, silk, cotton, plant and grass fibers, and even leather! Synthetics include polyester, nylon, polypropylene/olefin, rayon/viscose, and many fiber combinations.

There’s a lot of inferior fiber out there that does not perform well,” Ginger says. “We’re the ones who see it after people have had the rug a while. They want it to look like new again, and it just won’t.

She suggests first looking at rugs made of natural fibers, like wool, silk, or cotton. These tend to be long-lasting and comfortable.

Wool

According to Ginger, it’s the best out there and has been so for hundreds of years. Think of Persian rugs that have lasted centuries! Wool is durable, totally natural, and comfortable because of its dense fibers. Additionally, wool is resilient and has good memory. That means the fibers will bounce back, even after a heavy chair or table has sat in one place for a long time. Some treatments can ruin a wool rug, though, so you do need to be careful about how you care for it. Also, keep in mind that wool is absorbent, so it can soak up whatever you spill on it, if you don’t immediately blot up the liquid.  Wool is also more expensive than other fibers.

Sisal and jute

Rugs made of these fibers can be very attractive and can be woven into patterns and textures you can’t get from other fibers. Sisal and wool are natural plant fibers that are coarse and can feel rough underfoot. They’re resilient and can last a long time, but they’re also absorbent, so stains and watermarks are hard to remove. They can also be difficult to vacuum, as soil buries itself down in the weave. These types of rugs would be well suited for high traffic areas where spills would be minimal.

Silk and viscose

Silk rugs, made from silkworms, are beautiful, easy to dye and very soft. They feel luxurious and should be treated as such, because they’re not very durable! True silk is very expensive, so you would not want to have it in a high traffic area. And buyer beware: many times, buyers are told a rug is real silk, when it is really a synthetic. It’s sometimes hard to tell the difference between real and fake silk, which has names like viscose, rayon, faux silk and art silk. As Ginger says about these fake silks, “the day you buy a viscose rug is the best it will ever look.” If you redecorate often, however, this affordable fiber can be a good option, as its lower price point may be its best feature.

Learn more about the pros and cons of different rug fibers.

When it comes to rugs made of synthetic fibers, Ginger recommends nylon.

Nylon

“Carpet manufacturers come out with new fibers all the time,” she says, “but they keep coming back to nylon.” Nylon comes in a limitless selection of colors and styles, it’s tough and durable, yet it has a silky sheen that people find attractive.

Olefin/Polypropylene

These synthetic fibers are derived from plastic, so they can stand up to high traffic and are good at repelling stains. This can be a good fiber to use outdoors or in a playroom. It is oleophilic, which means it loves oils, so it will “dull out” in a high traffic area. Olefin/polypropylene also has a low burn rate, which matters if you’re going to drag a heavy piece of furniture over it or place the rug in front of a fireplace. The friction or heat from a spark can cause the rug to scorch. This fiber does not have the memory of wool, so spots where furniture has left dents won’t spring back.

Choosing a rug with Ginger’s dog, Bitsy

Choosing a rug with Ginger’s dog, Bitsy

Construction

Now that you’ve decided what types of fibers fit the bill for your needs, it’s time to look at the construction of the rug. In general, natural fiber rugs are handmade, rather than mass-produced. Synthetic rugs, on the other hand, are made by machines and can be customized in a huge array of colors, patterns and sizes.

There are many ways of constructing a rug . . . hand-knotted, flat-weave woven, tufted, hooked, braided, needlepoint, just to name a few. When choosing a rug, look at the back of it. Ginger says that’s the roadmap that tells you everything about the rug’s construction, including determining how certain rugs were made. Ideally, you want to see and feel the same fibers on the back of the rug as on the front. That usually means the fibers are woven and knotted so tightly they don’t need any backing to hold the rug together. There are also many wool machine-made rugs that are excellent, last a long time and perform well.

She continues, “Usually, if you see fabric on the back , it’s a tufted rug. That backing can give a rug stability, but it also traps stains and makes the rug harder to clean.” In addition, the glue on the backing can have an offensive odor. Over time, that glue will turn to dust, and the backing will delaminate. “If you have kids or pets and expect stains, you don’t want to see backing on a rug,” she notes.

Hand-knotted rugs have been around forever and hold up well. However, many recent productions are bleached and sheared so low to give the look of an old rug, that they many not last as long. There can even be issues with older Persian rugs that have been repaired or may not have colorfast dyes. Flat weave rugs, which include woven and braided rugs, are nice, because you can usually turn them over and use both sides. These include kilims and dhurries.

Related: How to Choose Tile for Your Home

Now it’s time to choose the right rug for your space! After researching rug fibers and construction, you’ll know what to look for at the store, and you’ll be able to find a quality rug that suits your needs.

lida-sahafzadeh-1270514-unsplash.jpg

Color and size

Of course, you want your rug to match your décor and fit your space. Ideally, you’ll select the rug first, as mentioned above. “I think the rug should be the centerpiece of any room,” Ginger said. Now, though, when you beeline to the rack of rugs in the right size, you’ll know what to look for when you spot colors and patterns you like.

Protect your investment

After you buy, consider treating your rug with a stain protectant, especially if it’s made of natural fibers. That’s an easy way to prevent stains and make your investment last even longer. Also consider having a custom rug pad made, especially if you have hardwood floors. The rug pad will prevent the rug from slipping, will give more cushion and will protect your floors. Both of these are available at Interior Care, which also carries a new moisture barrier pad that protects your floors from pet stains and other spills.

Lastly, Ginger advises that you understand what you’re buying. You can contact her or another rug expert before you purchase anything, like taking a car to a mechanic before you buy it. Ginger can tell you if she’s seeing problems with a particular brand or fiber.

adorable-animal-canine-164446.jpg

Whichever rug you choose, make sure it’s one you can enjoy! If you want to change your décor often, or you have kids or pets, you might not want to spend the money for a Persian rug. “Dogs are the best appraisers, “ Ginger jokes. “They always pee on the best rug in the house!”. Nearly 80% of the rugs Interior Care receives for cleaning are the victims of pet accidents, and the stains are often permanent.

However, as Ginger’s mother used to say, “You can never go wrong with an oriental rug. They go with anything!”.

Interior Care, Inc. was established in 1988 to provide quality cleaning services for fine furnishings and fabrics in the Chattanooga, TN area. Ginger, our business owner and founder, has over 30 years of experience in the cleaning industry. We are certified by IICRC, The Clean Trust, Wool Safe and Master Rug Cleaner using only manufacturer-recommended products and procedures.

WE HOPE THESE IDEAS AND TIPS ARE INSPIRATIONAL. PLEASE CALL ME WITH ANY OF YOUR HOME BUYING OR SELLING NEEDS AND QUESTIONS. (423-421-9192)

Gail+Jenkins.png

How to Decorate Your Thanksgiving Table

iStock-1040980274.jpg

We spend days preparing for Thanksgiving - gathering recipes, shopping, cleaning, and cooking a lavish meal to enjoy with family and friends. One way to make the meal even more special is to serve it on a beautifully set table. Jamie Rehm, owner of Bud Floral + Home, shared some of her favorite tips for creating an elegant tablescape for the occasion.


CHOOSE YOUR DISHES

Whether you opt for simple white or your grandmother’s china, Jamie recommends that you first decide which dishes to use for the meal. “This will help you decide on accent colors for your centerpiece,” she adds.

Photo by Payton Ferris on Unsplash

Photo by Payton Ferris on Unsplash

USE A TABLE RUNNER

A good next step is selecting a table runner to use, especially if you have a long, rectangular table. “A roll of butcher paper is easy, or you can use a painter’s drop cloth, folded in half lengthwise,” Jamie suggests. You can use a table runner alone, or pair it with your favorite table cloth for a more formal look.

Photo by Hannah Busing on Unsplash

Photo by Hannah Busing on Unsplash

FIND INSPIRATION IN THE GROCERY STORE

Jamie says, “I like to look for fun fruits and vegetables, like gourds, to lay along the table. You can spray paint them in your accent color to create consistency and calm the look of your busy holiday table.”

Related: 5 Tips to Organize Your Guest Room & Welcome Your Visitors

Photo courtesy of Jamie Rehm

Photo courtesy of Jamie Rehm

PICK SIMPLE FLOWERS

“For a big impact, pick simple flowers, all in one color,” Jamie suggests. She recommends using white hydrangeas. For a fall look, you can also opt for dried flowers, right from your yard. Once you’ve decided on your flowers, gather enough to arrange them into one large, low vessel for the center of the table, or three smaller vessels. Keeping these arrangements low will make it easier for your guests to see each other and keep the conversation flowing.

FORAGE

Now, it’s time to head outside and cut some fall branches and greenery. Look for branches with berries, colorful leaves, or other visual interest to spread down your table.

Photo by rawpixel on Unsplash

Photo by rawpixel on Unsplash

LIGHT IT UP

Candles are a traditional option, but you may not want the worry of passing food across the flame or having wax melt onto your heirloom linens. Instead, you can opt for battery operated twinkle lights and tea lights to make your table festive.

Related: 5 Ways to Spice up Your Christmas Dinner Table

PULL IT ALL TOGETHER

Photo courtesy of Bud Floral + Home

Photo courtesy of Bud Floral + Home

Now that you have a plan, and you’ve gathered up all the elements of your tablescape, it’s time to put it all together! Thanksgiving Day can get hectic, with guests arriving and hours of food preparation, so give yourself the gift of time by starting a day or two early.

  1. Put down your table runner

  2. Place your flowers in vessels and place on the table

  3. Lay out your greenery or garland in between your floral arrangements

  4. Place your gourds, fruits and vegetables within the garland

  5. Add your battery operated twinkle lights and tea lights just before your guests arrive

Bud Floral + Home is based on Signal Mountain and offers flowers, home decor, and services including weddings, events, classes, deliveries, weekly subscriptions and more. Bud sells fresh flowers and home goods daily at Pruetts on Signal Mountain. View their class schedule and learn more about their offerings by visiting them online at budfloralandhome.com.

WE HOPE THESE IDEAS AND TIPS ARE INSPIRATIONAL. PLEASE CALL ME WITH ANY OF YOUR HOME BUYING OR SELLING NEEDS AND QUESTIONS. (423-421-9192)

Gail+Jenkins.png

Spice Up Your Porch for Fall

iStock-187244519.jpg

Football season has started, so you may be dreaming of sipping cider on your porch in cooler weather. Fortunately, if you like to spruce up your space for each season, you can get your porch ready for fall without spending a fortune. To get you started, I talked with Lindsey Frost, owner of Frost Designs, Inc., who shared some of her ideas and inspiration for fall decor. 

First, Lindsey suggests you clear off your porch. Put away any summer decorations, then give it a good sweep so you can start fresh. Then, walk out to street level and look toward your house. “Before you decorate, get a good sense of just how much space you’re working with and what’s actually visible from the street,” Lindsey said. 

She also suggests choosing your color scheme based on your home’s exterior and landscaping. “It doesn’t all have to be orange and brown,” she said. “For example, if you have pansies or mums, you can pull out the yellows and whites. The main thing is to complement your home’s look while dressing it for the season.” 

Spice Up Your Porch for Fall

Decorate to Scale 

After you’ve done all that, consider the size of your space to understand what your porch and steps can handle. 

For a smaller area, you may be working with your front door, sidelights, and a few steps. If that’s the case, Lindsey suggests focusing on what’s going to make the biggest impact. She recommends starting with the door. “If the door is the main focus, you could put garland around it, hang a large wreath, or flank it with tall corn stalks tied with burlap ribbon.” In a smaller space, she suggests also adding a pop of color, like a bright ribbon or painted pumpkin that will be visible from the street.

For a larger area, you can play more with layering to fill the space at various heights and with different colors and textures. And don’t just limit yourself to pumpkins and squash! There are plenty of other fall vegetables you can use. Layer and stage them at different heights to balance each side, and fill in the big spaces with mums, larger pumpkins, a big battery- powered hurricane lamp, and a basket of firewood or pinecones. 

iStock-90915642.jpg

Go Natural

Fall decorating lends itself to a more rustic look that you can achieve by using natural materials. Think apples, squash, pumpkins, leaves, pinecones, ornamental cabbage, hay bales, and corn stalks. You can even clip some branches when the leaves start to turn, then tuck those into urns or pots. 

Related: How to Decorate Your Thanksgiving Table

Then, get creative! Those pumpkins and gourds don’t have to be orange and white. You can paint them different colors, add patterns, or wrap them in fabric for a modern twist on a traditional look. 

Image by Emily May @gohausgo

Image by Emily May @gohausgo

Use What’s On Hand

Lindsey suggests using things you already have, so you don’t have to spend a fortune make your fall porch cozy. Look around for things like a vintage ladder, throws, and tea towels in fall colors, gardening tables, or baskets, crates and old crocks. These different items can work together to help you mixing textures, heights and colors to fill your space. “I like to use galvanized olive baskets in the fall, and just put pieces of firewood in the basket at the front door,” Lindsey offered. 

If you’ve got one prop up a wooden “Welcome” or “Gather” sign, or look for a hand-lettered “Happy Fall, Ya’ll” sign. The rustic farmhouse look is popular now, and any of those wooden signs with friendly saying create that warm feeling of friends and family we associate with fall. 

When you’re done with those finishing touches, all that’s left is to pour some wine or cider, and relax with your neighbors and family.

WE HOPE THESE IDEAS AND TIPS ARE INSPIRATIONAL. PLEASE CALL ME WITH ANY OF YOUR HOME BUYING OR SELLING NEEDS AND QUESTIONS. (423-421-9192)

Gail+Jenkins.png

Seeing Spots in Your Yard?

Source: Lawn Doctor of Chattanooga

Source: Lawn Doctor of Chattanooga

Get tips for preventing brown patches in your lawn

This summer’s weather has been hot and humid, a perfect recipe for Brown Patch Disease in local lawns. Fescue grass prospers when it’s 65-75 degrees, so fescue is especially vulnerable to the fungus that causes Brown Patch Disease when the temperature rises and grass stays moist. Fortunately, there are steps you can take to keep your grass healthier (and greener!) this summer.

We talked with Renata Clark at the Lawn Doctor of Chattanooga and learned these tips for preventing brown patches in your yard:

Photo by Anthony Rossbach on Unsplash

change your watering routine

IF THE GRASS STAYS WET, YOU’RE INVITING FUNGUS TO DEVELOP.
  1. Water your lawn in the morning, and never water after 3 p.m. You want to give the grass plenty of time to dry out again after being watered.

  2. Water 20-30 minutes per zone, but water less frequently than you would in drier weather. Don’t water every day.

  3. Check for pooling or drainage problems. Any spot in your yard that stays moist can be a breeding ground for fungus.

Photo by Daniel Watson on Unsplash

mowing: less is more

IF YOU CUT FESCUE GRASS TOO SHORT, IT WON’T SURVIVE THE HEAT OF SUMMER AND WILL TURN BROWN.
  1. Mow the grass as high as you can, and mow less often.
  2. Don’t mow when the grass is wet.
  3. Mow every 2-3 weeks.

If the brown spots have already taken over, contact the Lawn Doctor for help! They can treat the fungus once it has started growing in your yard. They also offer a preventive fungus application during May and June, so put a treatment on your calendar now for next spring.

For more lawn care tips, read 5 Tips for a Beautiful Lawn this Spring, or visit the Lawn Doctor of Chattanooga online.

WE HOPE THESE IDEAS AND TIPS ARE INSPIRATIONAL. PLEASE CALL ME WITH ANY OF YOUR HOME BUYING OR SELLING NEEDS AND QUESTIONS. (423-421-9192)

Is My Wedding Ring Covered by My Homeowner’s Policy?

wedding ring photo by chuttersnap on Unsplash

To find out the answer to this question, I talked to Keith Rocha at The American Insurance Group. His answer, by the way, is “Maybe.”

General Homeowner's Policies

According to Keith, “Most home policies have property limits on certain specialty items like jewelry, guns, art and other valuables.” He said typical policies may provide up to $2,500 for those special items. That’s $2,500 for ALL of those items, not per piece, so it’s clearly not enough protection against loss of your most precious possessions. Additionally, the coverage provided for jewelry on a homeowners policy is limited, meaning the policy might cover jewelry lost in a fire but not jewelry that is stolen or simply lost.

Related: Should You Insure Your Home for Purchase Price or Replacement Cost?

Personal Articles Floaters

bridget-flohe-339785-unsplash.jpg

To provide adequate coverage for these higher valued items, Keith says the safest bet is to “schedule” the items on a personal articles floater. You can purchase a personal articles floater as either a separate policy or as a rider added to your homeowners policy, depending on which insurance carrier you use.

A personal articles floater allows you to insure your wedding ring and other valuable items at their full values. Ideally, for the broadest coverage, jewelry should be scheduled, or itemized, on an inland marine/personal property floater. This can provide all-risk coverage, which means your ring and other scheduled valuables are covered for any risk that’s not explicitly omitted in the policy.

What You’ll Need

Some insurance carriers provide blanket coverage, but in most cases, you’ll need to provide an appraisal and/or bill of sale documenting your ring and its worth. It’s also smart to take pictures or video footage of your wedding ring and other insured valuables. Keep those visuals somewhere safe, along with your appraisal and proof of purchase, so you’ll have everything you need to make a claim.

WE HOPE THESE IDEAS AND TIPS ARE INSPIRATIONAL. PLEASE CALL ME WITH ANY OF YOUR HOME BUYING OR SELLING NEEDS AND QUESTIONS. (423-421-9192)


Gail+Jenkins.png

How to Choose Tile for Your Home

How to Select Tile for Your Home

When it comes to picking tile for your home, your options are virtually limitless and quite possibly overwhelming! That’s why having an expert walking you through the process can ensure you end up with a look that you love. I talked with Sarah Lauletta, interior designer at Louisville Tile Chattanooga, who shared pointers about how to select tile for your next home project.

Bath-Shower-Tile.jpg

Set the Scope

Decide where you need new tile. It seems easy, but make a list of all the places you want new tile, like flooring, walls, showers, and your kitchen backsplash. For example, are you redoing a single shower or an entire kitchen? The size and complexity of the work you’re doing will definitely impact the cost of the work and materials.

Know Your Allowances

Work with your contractor to make sure you have a solid understanding of your overall project budget. Even better, find out what specific allowances your budget includes for tile. Ideally, before you start picking out tile, you’ll know exactly how much has been budgeted for the tile and any related costs. If your budget isn’t that detailed, you can arrive at a close estimate by knowing the square footage of the space and your project budget to arrive at the price per square foot.

Related: 5 Mistakes People Make When Remodeling Their Kitchens

Marine-Fog-Shower-Tile.JPG

Pick a Palette

...or bring in a piece of your countertop. It’s much easier to make a tile selection when you have a focal point or focal color to work with. And it’s not just the color that matters. For example, if your countertop has a busy design that’s full of movement, you’ll want your tile more muted, so the countertop won’t lose its wow factor. Or if your counter is a solid slab of cement, your tile can add a punch of color or pattern to your room.

Related: 4 Ways to Keep Your Countertops Looking Like New


Choose Your Tile and Pattern

This is the fun part! Now that you know exactly what rooms or spaces you’re tiling, how much you can spend on each space, and you’ve thought about the color and style of tile you’d like, you get to hit the showroom floor. By bringing in pictures of rooms, patterns, and tiles that you like, you’ll make the process even easier, and you’ll be more likely to end up with a finished look that you love. If you’re remodeling, bring pictures of the rest of your house, so you can update your space without losing the character or overall style of your home.

Salad-Pebble-Shower-Tile.JPG

Related: 4 Tips on Choosing Fixture Finishes

This is where a professional can really help you, because they’ll know what extra trim pieces you might need and can offer suggestions about tile patterns and accents to give your room the polished look you want. A pro can even make recommendations for paint colors, faucets, light fixtures and finishes, cabinet pulls and other details to finish out your project.

(Photos courtesy of Louisville Tile Chattanooga)


WE HOPE THESE IDEAS AND TIPS ARE INSPIRATIONAL. PLEASE CALL ME WITH ANY OF YOUR HOME BUYING OR SELLING NEEDS AND QUESTIONS. (423-421-9192)

Gail+Jenkins.png

5 Tips to Organize Your Guest Room & Welcome Your Visitors

5 tips to organize your guest room

Whether family is coming in for the holidays or a friend is just passing through town, it’s easy to embrace your hospitality skills and make your guest room warm and comforting.

1. Eliminate the clutter…

Sure, clutter says, “Hey, I’m at home in my mess, and I invite you to feel at home, too.” But there’s a difference between making things homey and letting it all hang out.

First, go area-by-area in your guest room to remove things that don’t serve your needs, or at least your needs for the guest room. Donate old toys and clothes that have been stored for too long, recycle out-of-date magazines, and relocate (or let go of) half-finished hobby projects.

Next, consider clearing out overly delicate, fiddly, or fragile items, or move them out of reach to minimize your guests’ worries they might knock something over.

2. …But don’t feel like your guest room has to be sparse.

Your guest room doesn’t have to have as much white space as a museum. If you use your guest room closet for a gift closet or to store your off-season clothing, there’s no reason to revamp. Just make sure that there’s adequate closet or drawer space for your guests to hang or store what they bring. Chances are, they won’t be staying longer than a week, so don’t overestimate how much space they’ll need. Three dresser drawers should do it.

Make sleeping the priority, and make the bed with fresh (and matching) sheets, blankets, comforters, and a bedspread. Invest in a few different types of pillows – down and foam – in case your guests have allergies.

3. Shed a little light on the subject.

Even if you have overhead lighting in your guest room, keep at least one bedside lamp for reading. (If your guest bedroom has a queen or king bed, opt for two lamps.)

Have a nightlight, preferably one with a light sensor or motion sensor, so it’s not necessary to turn it on or off.

Install blackout curtains or vertical blinds so your guests can luxuriate in darkness while sleeping.

4. Don’t make your guests guess.

Anticipate questions your guest may have. Print (and perhaps laminate) an index card with:

  • the Wi-Fi network name and password
  • your security alarm code (and how it works)
  • your address & landline number (in case they order pizza or must call 911)
  • the location and instructions for adjusting the thermostat
  • where to find extras (toilet paper, pillows, towels, blankets, aspirin)

Display a few small dishes or decorative trays so guests know where it’s safe to put jewelry, eyeglasses, and phones within easy reach.

Alarm clocks are still a nice touch. Many people below a certain age will use their cell phones, but it can be comforting in a strange space to have an alarm clock, preferably one that doesn’t tick noisily or glow too brightly.

5. Make your guest room homey, and then add the amenities of a spa.

Attach a full-length mirror to the back of the bedroom or bathroom door, or lean it against the wall.

Install over-the-door valet hooks or removable 3M Command hooks on the reverse of the bedroom or bathroom door to easily hang clothing or robes. Keep a variety of nice hangers in the closet. (Quoting Joan Crawford: “No more wire hangers!”)

Set out a tray with a few water glasses or coffee mugs so guests need not traipse to the kitchen for a drink of water. Consider filling a pretty glass carafe with ice water before bedtime.

Keep a small wastebasket with a new liner near the bed. If you think guests might be nervous about using a too-tidy basket, crumple up one small piece of paper and (like a grocery list) and toss it in, so your guest knows it’s not just for show.

On a desk or bedside table, create convenience for your guests.

  • Create a charging station for multiple gadgets with a multi-port USB hub/charger.
  • Pile some non-controversial books – a few cozy mysteries, a book of short stories – in case your guests can’t sleep.
  • Put out a box of tissues.
  • A few tourism brochures – you can usually pick them up at the mall or tourism office – help your guests think about what they might want to do while visiting.

In your guest bathroom, treat guests to a basket of extras: new toothbrushes, mini-toothpaste & mouthwash containers, floss, and tiny bottles of shampoo, conditioner, and moisturizer. Leave a hair dryer hanging from a small hook or handy in a tidy organizer.

Julie Bestry is a Chattanooga-based Certified Professional Organizer, speaker, and author who helps individuals and businesses save time and money, reduce stress, and increase productivity through new organizational skills and systems. For information on how Julie can turn your chaos into serenity, visit her at Best Results Organizing.
 

WE HOPE THESE IDEAS AND TIPS ARE HELPFUL. PLEASE CALL ME WITH ANY OF YOUR HOME BUYING OR SELLING NEEDS AND QUESTIONS. (423-421-9192)

Gail+Jenkins.png

Draft-Proof Your Windows for Winter

Draft-Proof Your Windows for Winter

One drafty window is a little like pulling one brick away from your house. Imagine pulling out a brick for every leaky window, and suddenly, it’s like have a window (or several!) wide open in the middle of winter. That’s the example Donald McKenna, owner of McKenna Exteriors, offered when talking about the importance of sealing up drafty windows for winter.

He mentioned health concerns, too. Older aluminum windows, especially, are prone to sweating, which allows mold and mildew to grow around the window frames. Wooden windows shrink and swell with changes in the weather. They, too, can let in unwanted air and moisture that rot the wood or invite mold and mildew to take hold. Left unchecked, mold and mildew can make their way into the sheetrock of your home, which holds moisture and compounds the problems.

So what can you do about rattling, sweating, drafty windows? McKenna recommends these steps:

LATCH YOUR WINDOWS

It sounds obvious, but sometimes we don’t realize our windows are unlocked. When windows are unlatched, they have a tendency to inch up, inviting air and moisture into the house.

CLOSE DRAPES AND BLINDS

This is an all around good energy-saving move. Window treatments provide physical barriers to cold air and wind, blocking that icy air from entering your home. You can also find shrink-film insulation products at home improvement stores that stick onto your windows, sealing them from drafts.

REPLACE YOUR WEATHER STRIPPING

Each year, check the weather stripping on your windows and replace any that looks worse for wear. While you’re at it, check for rotting wood, mold or mildew, and other signs that your windows need some routine maintenance.

CLOSE STORM WINDOWS

Walk around outside to make sure your storm windows are all closed. Also do a check to see if they’re caulked all the way around.

REPLACE YOUR WINDOWS

If you’ve taken all these precautions but still have drafty windows, it may be time to install new windows. McKenna suggests talking with an expert to determine which product is best for your home. They’ll take into consideration issues like your budget, your home’s style, your neighborhood’s design requirements, and the problem you’re looking to solve. From there, they’ll help you select the best windows for your home.


WE HOPE THESE IDEAS AND TIPS ARE HELPFUL. PLEASE CALL ME WITH ANY OF YOUR HOME BUYING OR SELLING NEEDS AND QUESTIONS. (423-421-9192)

Gail+Jenkins.png

Should You Insure Your Home for its Purchase Price or Replacement Cost?

Should You insure Your Home for its Purchase Price or Replacement Cost?

Knowing how much insurance coverage to buy for your home is harder than you expect. Should its insured value be the same as what you paid for it?  Keith Rocha, an insurance agent with  the American Insurance Group, said he frequently talks to homeowners who are unsure about the level of coverage they need. This is a question he hears often:

Should I insure my home for the purchase price?

Keith says the answer is usually no. Instead, he recommends you insure your home for the cost of rebuilding or repairing it, not for the amount you paid to buy it. These situations demonstrate why replacement cost is the better measure than market price:

When Land Costs are High

In some markets, the market value of land can be quite high. In those situations, the cost of the land makes the purchase price higher than what the replacement cost would be. You’d be over-insured if you covered the house at its purchase price, because your rates would be based on the land value, not the replacement cost to repair or rebuild the structure.

When the Market is Depressed

When housing inventory is high, there’s less competition from buyers, and prices drop. In that situation, you may be able to buy a house at a price that’s much less than you would spend to replace the structure.  Keith says, “In a depressed market, when deals are abundant, you can often buy homes for dramatically less than the cost to build the same house.” In that case, you’d be underinsured if you only protected the house for its purchase price.

One of Keith’s clients could have easily found himself in this situation. In a depressed market, he paid about $100,000 for a nine-unit apartment complex and put another $100,000 into renovations. A year later, he suffered a total loss of the building. Fortunately, he had insured it at its replacement cost - not the purchase price - and received $425,000 to completely rebuild the complex. His only payment out of pocket was the insurance deductible.

When You Buy a Foreclosure or a Fixer-Upper

Similar to the situation above, you may get a great deal on a home that needs plenty of TLC or gets auctioned on the courthouse steps. But if the home should burn down, the replacement cost would be significantly higher than what you paid to buy the house in the first place. Again, you’d be underinsured in the case of an emergency.

Regardless of the type of market you are in, your home should always be insured at the amount it would cost to rebuild. That way, you’ll be better able to restore or rebuild your home to its former condition.

One way to determine the replacement cost of your home is to ask a local realtor the average cost per square foot to rebuild in your area. Do the math, and don’t forget to include special features in your home, like custom woodworking, or marble floors, that would drive up the replacement price if you needed to repair or replace them.

Replacement costs can change over time, so it’s also a good idea to review your policy on a regular basis to make sure your coverage is keeping pace with inflation and other factors influencing the local market. Remember, too, to make sure you have adequate insurance coverage for everything inside your home - artwork, jewelry, furniture, clothing and your other possessions.

WE HOPE THESE IDEAS AND TIPS ARE HELPFUL. PLEASE CALL ME WITH ANY OF YOUR HOME BUYING OR SELLING NEEDS AND QUESTIONS. (423-421-9192)

Gail Jenkins

4 Pro Tips for Organizing Your Linen Closet

pro tips for organizing your linen closet

Moving into a new home gives you the opportunity to create successful systems from the start. One of the best ways to keep a household running smoothly is to have a well-stocked (but not over-stocked) linen closet.

1. Cut the Clutter

Minimize clutter and maximize your space by keeping only what you need and actually use. Review everything! Consider limiting the linen closet to towels and bedding before adding anything else. If possible, move cleaning rags and other supplies to the laundry room or bathroom cabinets.

Most households can make do with two complete sets of sheets per bed and two pillowcases for each pillow: one set for "wash" and one for "wear," with an extra “emergency” set for kids' beds. If your family prefers summer-weight and winter-weight sheets, having two sets per bed per season is fine, but if you’re short on space, you can store off-season items elsewhere in lidded tubs or nylon duffel bags.

Eliminate random extras like pillowcases that don't match any sheet sets or fitted sheets without flat mates. If you have more linens than you actually use, donate extras to charity. (Overly worn or stained towels can be donated to animal shelters.) Alternatively, stockpile excess towels and linens for future college or camp use in a lidded tub.

2. Divide and Conquer

THINK OF THE CLOSET IN TERMS OF ZONES, THEN SORT BY SHELF.

Think of the closet in terms of zones, then sort by shelf – sheets on one level, towels on the next, etc., with short, tidy stacks for each item type. Tall stacks tumble, and tightly packed fibers don't breathe! If you have multiple bed sizes in your home, make separate stacks for sheets and blankets for twin, full, queen and/or king beds.

Keep matched sheet sets together. After laundering, fold matching fitted and flat sheets and pillowcases together. For guest room bedding, if you have the urge to get fancy, tie the entire set with inexpensive grosgrain ribbon, making a pretty package.

Sort and store towels by type (bath sheets, bath towels, hand towels, wash cloths, beach towels, and “pet” towels); only subdivide by color if you have the patience. The goal is to make your linen closet functional, not photo-ready.

If your closet is deep enough, and you need an abundance of items, take the extra minute to store freshly laundered towels at the back, and move back stacks forward. Rotating ensures even wear-and-tear. Again, if your closet is deep rather than high or wide, keep off-season items (like flannel sheets in summer, beach towels in winter) behind current everyday bedding; when seasons change, rotate the front and back stacks. Otherwise, store off-season items on a much higher (or lower) shelf so you’re using your “prime real estate” for what you access the most often.

3. Accommodate the Extras

If you will be keeping non-linens in the linen closet, sort by categories (like cosmetics, toiletries, gadgets, cleaning supplies, First Aid) and store in plastic dishpans; they'll easily slide forward like drawers but keep clutter from spreading. Be sure to keep chemicals out of the reach of little ones.

Store lightweight but cumbersome or infrequently used items (like extra comforters, quilts and pillows) on the highest shelves, preferably in zippered bags to protect them from humidity and allergens. See-through bags are best; label opaque ones so you don't forget what you own. Stock lesser-used items like vaporizers, and bulk supplies of bathroom and facial tissue, on the closet floor.

organized washcloths

Fold bath sheets and towels in half, and half again, and then in thirds, hand towels in thirds and then in half, and washcloths in quarters—then stack like items together. Folding each similarly sized towel the same makes more space. Match edges, and store with the folded (smooth) side facing out for a tidy look. If space is at a premium, roll smaller towels and stock them vertically, spa-style, in baskets.

Don't feel obligated to keep all bedding in the linen closet. Blankets used solely for forts and playtime can be stored in lidded tubs in the playroom; extra pillows can be piled on a guest room bed or on shelves in bedroom closets.

Tightly roll indoor (slumber-party) sleeping bags and tie them with extra-long shoelaces so you can store them vertically or horizontally on high shelves or the closet floor.

4. Make Time for Maintenance

Take a moment or two when you put your laundry away to straighten things up, and you won’t need to organize your linen closet very often. Keep a donation bin near your laundry room so worse-for-wear items won’t go back into the linen closet.

Label the front edges of shelves (with a label maker or masking tape) so everyone in the house knows how (and where) to put things away properly.

Store only lightweight items on the closet floor to make mopping or vacuuming the linen closet easier.

Julie Bestry is a Chattanooga-based Certified Professional Organizer, speaker, and author who helps individuals and businesses save time and money, reduce stress, and increase productivity through new organizational skills and systems. For information on how Julie can turn your chaos into serenity, visit her at Best Results Organizing.


WE HOPE THESE IDEAS AND TIPS ARE INSPIRATIONAL. PLEASE CALL ME WITH ANY OF YOUR HOME BUYING OR SELLING NEEDS AND QUESTIONS. (423-421-9192)

Gail Jenkins signature

5 Mistakes People Make When Remodeling a Kitchen

The modern kitchen is the heart of the home. Whether it’s Saturday night or Tuesday morning, it’s the busiest room in your house (and has the heftiest price tag during a remodel). We asked Jackie Howard of Scarlett’s Cabinetry for her expert advice so that you won’t make these common remodel mistakes.

source: houzz

source: houzz

1. Forget the triangle – get in the zone!

Modern kitchens are bigger than ever so it’s helpful to think of “work zones” instead of the “triangle” design concept (keeping the stove, sink and refrigerator within 4-9 feet). Consider at least 2 prep areas, each with their own sink, disposal, and trash can. Large islands with lots of counter space or banquettes can multitask as seating or prep areas. Just be sure you have everything you need for your zone, like baking trays near the oven and skillets/spices near the stove. “My goal is always to design a kitchen to ensure there is ample space for everyone to join in and help prepare family meals,” says Jackie.

Related: How to Choose Tile for Your Home
 

source: houzz.com

source: houzz.com

2. Don’t overlook appliance innovations

“The new steam ovens allow you to cook fast and healthy – it’s the new ‘must have’ appliance,” says Jackie. Wolf has created one that can steam, bake, roast or slow cook. Combining steam and convection, it can defrost meat, perfectly roast ribs or steam cook an entire meal of fish, vegetables and rice. Also consider under counter refrigeration, which can be essential for keeping the work zone concept practical. You can store produce near a second sink for a salad/vegetable prep station, or drinks if room allows for a third bar area zone. 


source: houzz.com

source: houzz.com

3. Don’t keep the cabinets

If budget allows, you’re better to replace dated cabinets. At the very least, consider adding a few modern innovations such as appliance garages and mini pantries. Appliance garages allow you to keep things like your mixer, blender, microwave or coffee maker on the counter without visual clutter. Have the top of the “garage” be approximately your height with bi-fold doors so they’re not obtrusive when open. Mini pantries allow you to store things like olive oils, vinegars and spices near the stovetop. 

source: houzz.com

source: houzz.com

Related: 4 Tips on Choosing Fixture Finishes

4. Put the freezer on ice

“The freezer is the least used appliance in your kitchen and should not be in the middle of a major work triangle,” says Jackie. She recommends moving outside the kitchen, to an adjacent pantry or utility room. There are many refrigerator only options on the market that allow you to do a separate full-sized freezer elsewhere.


source: houzz.com

source: houzz.com

5. Don’t keep spices in the top drawer

While Jackie recommends keeping spices in a drawer for freshness, she likes to use a second drawer with tilted insert. “A top drawer is typically too shallow for the larger spice containers we use,” she says. “A middle, taller drawer allows various sizes to be stored together – even your baking powder and baking soda fit.” Some people also opt for a tall, pull-out drawer. 
 

source: houzz.com

source: houzz.com

WE HOPE THESE IDEAS AND TIPS ARE INSPIRATIONAL. PLEASE CALL ME WITH ANY OF YOUR HOME BUYING OR SELLING NEEDS AND QUESTIONS. (423-421-9192)
 

5 Top Home Trends and How to Incorporate

If you’re looking to freshen up your space, Michelle Workman is the woman to call. With a keen eye for color she expertly mixes modern and vintage to create spaces that reflect each client’s personality. We sat down with her to learn the top 5 home trends this year and how you can easily incorporate them into your home (while still staying true to your taste).
 

1. Go Big or Go....Easter?

Michelle Workman Interiors, michelleworkman.com

Michelle Workman Interiors, michelleworkman.com

D Magazine, dmagazine.com

D Magazine, dmagazine.com

Color is coming back in a big way. The two prevailing trends are either “sexy and saturated” or “perfect pastels.” Darker colors include a green deeper than emerald, dark blue with a hint of green and fuschia. Pastel hues include hydrangea blue, periwinkle, mint, blush or pale pink and lilac. Color can be scary, but Workman encourages people to take the plunge. “If you really love a color you’re not going to get tired of it, even if it’s strong,” she says. “It’s really about decorating to your personality rather than your neighbors.”

How to Incorporate:
The easiest, least expensive route would be painting your walls for a fresh new look. You can also reupholster a major piece of furniture with color, such as a sofa for high impact. Choose a palette to work in (pastel or saturated) or choose a single color, such as blue and go for a high-low look.


2.    “Deco” the Halls

http://blog.asmarainc.com

http://blog.asmarainc.com

left: rejuvenation.com; right: 1stdibs.com

left: rejuvenation.com; right: 1stdibs.com

This year brings a strong resurgence of Art Deco, a design and architecture style between the First and Second World Wars. Inspired by ancient Egyptians and Aztecs, the movement was actually a celebration of industry and modernity, with chrome and stainless steel applications used for the first time. Art Deco is known for its streamlined style and geometric shapes, as well as finishes like velvet and black and white checkerboard. 

How to Incorporate:
Workman suggests adding Art Deco flair with a coffee or side table. You could also choose a geometric mirror or velvet side chair. For more inspiration, see her “Art Deco” Pinterest board


3.    50 Shades of Cream

Top and bottom: Michelle Workman Interiors, michelleworkman.com

Top and bottom: Michelle Workman Interiors, michelleworkman.com

Finally, gray is taking a backseat. The emerging neutral is cream, but the tone is anything but vanilla. Studies show cream to have a calming effect, and the shade du jour has a slightly pink undertone which makes every skin tone look great. 

How to incorporate:
"I would never recommend cream on upholstery - particularly people with kids - because of stains,” says Workman. “Instead think walls or curtains if you want something in fabric. It provides a gentle, soft backdrop for any color you want to do on furnishings.”


4.    Exotic Finishes

Shagreen Tray, Aerin, NeimanMarcus.com

Shagreen Tray, Aerin, NeimanMarcus.com

Zebrawood coffee table, GalahadFurniture, Etsy.com

Zebrawood coffee table, GalahadFurniture, Etsy.com

Shagreen (pronounced ‘chagrin’) – also known as sharkskin – is appearing on everything from side tables to consoles. Other exotics include parchment (originally goatskin), ostrich skin, tortoise shell and lesser known woods like zebrawood or burl.  

How to incorporate: 
“For maximum impact you could choose a desk wrapped in shagreen or parchment, or a coffee table in zebrawood,” suggests Workman. Smaller applications could include accent boxes, lamps or a tray for your coffee table. 


5.    Geometric

http://trendenser.se/

http://trendenser.se/

society6.com 

society6.com 

Everything from fabric to furniture is getting a geometric makeover, but the biggest area for this trend is in lighting. “Adding modern pieces to your home give it a significant freshening, particularly if you have a more traditional space,” says Workman. “And you can mix styles now – there’s an overall relaxing of the rules. It creates a collected or curated look that’s very European.”

How to Incorporate:
Look for pieces that are faceted, particularly in lighting. Geometric fabrics mix well with everything, so consider mixing new accent pillows or a small piece like an upholstered bench in complimentary colors. 


Bottom line:
Don’t decorate your home according to trends. Workman suggests using them for inspiration, but cautions you to go with pieces and color choices that speak to you or are personally meaningful like a family heirloom. 
 

5 Tips for a Beautiful Lawn this Spring

Spring is around the corner. If you want to make this the year for a beautiful yard, it’s time to start planning now. We asked Allen Clark, owner of Lawn Doctor for his best tips on what you can do now for a lush, green lawn later. 

(Readers receive 50% off First Lawn Maintenance service and 50% off first Mosquito, Flea and Tick Treatment when you mention this article)

1.    Feed Your Lawn

“Fertilizing is one of the most important things you can do for your lawn this spring,” says Clark. “It replenishes nutrient reserves that were depleted over the winter.” While general turf fertilizers are available, it’s best to understand what kind of grass you have and the condition of your soil. For example cool season grasses (fescues, ryegrasses) need to be fertilized at different times than warm season varieties (bermudagrass, Zoysia). “Every lawn has its own, unique fertilization needs, so hiring a service takes the guess work out of it,” he says. “We can create a customized plan for optimal growth and minimal weeds.”

2.    Wipe Out Weeds

Beautiful spring days are meant for more than pulling weeds, and sprays can be harmful to children and pets. February and March are the best time to stop weeds BEFORE they start by using pre-emergents. This helps prevent crabgrass and other grassy weeds from taking root (and taking over). It’s also important to maintain your landscaping beds so that weed seeds aren’t spread across your lawn.

3.    Give it Room to Breathe

Over the winter, soil becomes compacted and thatch builds up from months of not mowing or raking. “This restricts your grass’s access to much-needed nutrients,” says Clark. The answer is aeration and spring is the time for Bermuda and Zoysia grasses. (Fescue Grass is aerated in the fall).

4.    Banish Bare Patches in Warm Season Grasses (Bermuda and Zoysia)

Late spring is the perfect time for overseeding or sodding as warmer weather and spring rains can create ideal growing conditions. To prep your lawn, mow at the lowest setting. Follow with a rake to remove dead grass and loosen the soil. Broadcast new warm-season grass seed or place sod and water daily until established. Limit activity on the lawn until grass is mowing height.

5.    Consider the Critters

Warm weather also brings unwelcome pests such as mosquitoes and ticks. The Lawn Doctor’s Yard Armour Program (applied April through August) is designed to eliminate mosquitoes and ticks currently living in your lawn and prevent future infestations. “This is especially helpful after a mild winter like we had this year,” says Clark. The Lawn Doctor also has solutions for common lawn pests like fire ants and moles.

5 Ways to Know if Bellhops is Right for You

If a new house is part of your New Year, you need to know about Bellhops. Often referred to as the “Uber of moving,” Bellhops is roughly half the cost of traditional moving companies. But their unique service isn’t for everyone. Here are 5 ways to know if this next-gen mover is right for you.

1.    You’re working on a tight timeframe

Maybe you enjoy the soothing sounds of on-hold music, or waiting for a call back from a company. If not, you’ll appreciate Bellhops’ online instant booking feature. Rather than wait for a slow-turn moving quote, you simply plug in all your information on the website and receive a quote right on the spot. 

2.    You’re planning a small-scale move

If you live in a 5-bedroom house filled with precious antiques, Bellhops isn’t for you. (They can’t insure or move pianos, antique furniture, and other highly valuable items.) While they specialize in bungalow, condominium or apartment moves, you can still take advantage of serious cost savings. In the greater Chattanooga area, Bellhops offers labor-only moving help (you supply the truck) as well as full-service moves (they supply both the labor and the truck). You can choose the service based on your specific needs. 

Related: 5 Ways to Make Your New Home Your Own

3.    You appreciate clean-cut, energetic and optimistic movers

Every ‘bellhop’ must be currently enrolled in college and is hand-picked for their work ethic and optimism. Much like Uber, ‘bellhops’ claim the jobs they want when it works with their schedule. Bottom line, they want to be there and their enthusiasm shows. 

4.    You’re not moving but still need a helping hand

Doing a little redecorating for the New Year? Opt for the “In-Home Move” option for help rearranging furniture or “moving” items from the attic to the dump! Simply tell them how many bellhops you need, for how long and when and help is on its way. 

5.    You want highly rated movers

Bellhops has a 4.8 out of 5 rating on Google and 5 star ratings on Yelp. Customer comments includes things like, "I can't recommend them highly enough!", "They exceeded my expectations!" and "THIS IS THE BEST MOVING COMPANY EVER!!"


WE HOPE THESE IDEAS AND TIPS ARE INSPIRATIONAL. PLEASE CALL ME WITH ANY OF YOUR HOME BUYING OR SELLING NEEDS AND QUESTIONS. (423-421-9192)


Gail-signature.png

5 Ways to Spice Up Your Christmas Dinner Table

Everyone has their favorite holiday dish. But if you’ve been sitting down to the same dinner for over a decade it’s time to spice it up – and we don’t mean in the kitchen. A well-executed tablescape can turn your typical Christmas dinner into an event. We sat down with Laura Hartman of Fischer Evans for some practical tips on how to make your holiday dinners shine.


1.    Set the tone with the table

Start by selecting the China you want to use. “That will determine your color scheme and overall feel – formal or casual.” If your pattern is formal, keep linens and other elements fairly subdued, such as classic white hemstitch napkins. Christmas pottery or stoneware, such as Vietri’s Old St. Nick can accommodate more color, such as red and white striped napkins.

Either way, don’t be afraid to mix and match patterns. It gives an eclectic feel and is a great way to incorporate any inherited patterns from older generations. Hartman recommends using different patterns on different tables, such as a more whimsical or casual pattern for the kids’ table. Just keep centerpieces similar to tie it all together.


2.    Don’t let the centerpiece take center stage

There’s nothing worse than trying to peek around flowers to talk to people. Try three low containers spanning the table rather than one tall one in the center. And remember to accent with candles or votives for evening meals. Flowers don’t have to break the bank. Evergreens and hollies from the yard accented with white tulips or roses are always Christmas classics. 

Related: 5 Ways to Organize Your Guest Room & Welcome Your Visitors


3.    Paper napkins won’t cut it

Christmas comes once a year – break out the linens. Monogrammed napkins and table runners are always popular and lend a personal feel. Hartman recommends either a neutral color monogram, such as taupe or green, or going monochromatic (white on white). If buying new, Fisher Evans carries “wash and wear” linens that don’t have to be ironed. 


source: Wedding Bee

source: Wedding Bee

4.    Consider the little touches

Up the ante with festive touches like antler napkin rings. And don’t be afraid of place cards to mix up the conversation and add visual interest to centerpieces. Use mixed tea cups and saucers filled with flowers and attach the name to the handle. Or think of “take-aways” such as bagged cookies or potted herbs with names attached. “Have two-inch pots of rosemary at each persons’ place with a rosemary topiary in the center,” she suggests. “That way you have a place card, favor and centerpiece all in one.” 

Related: Draft-Proof Your Windows for Winter


5.    Don’t sideline the sideboard

A buffet or table in the dining room is the perfect place to showcase a silver tea service, a crystal vase or grouping of compotes. Mix materials to add interest, and carry the greenery and flowers over to unify the dining room. A garland always looks great over a mirror. Consider an artificial garland for body and bulk, with fresh magnolia, holly, pine or cryptomeria layered on top.

WE HOPE THESE IDEAS AND TIPS ARE INSPIRATIONAL. PLEASE CALL ME WITH ANY OF YOUR HOME BUYING OR SELLING NEEDS AND QUESTIONS. (423-421-9192)

Gail+Jenkins.png

4 Ways to Keep Your Counters Looking Like New

photo credit: Stone Source, Inc.

photo credit: Stone Source, Inc.

The holidays are here, which means you’ll want squeaky clean countertops for all those house guests. We caught up with Anna Baker of Stone Source for some easy tips on keeping your countertops looking like new, whether they’re Carrara or Quartz.


1. Know Thy Stone

Before you can clean it, you have to understand it. There are basically two categories in solid surface countertops: (1) marble; (2) everything else. 

MARBLE is a carbonate, which means anything acidic like lemons or even tomatoes will eat away a tiny bit of the surface, creating dull spots known as etches.

Other surfaces such as QUARTZ and GRANITE are tough enough to withstand more aggressive cleaners. If you like a streak-free clean, you can even use ammonia-based sprays such as Windex. 

While less common, SOAPSTONE and LIMESTONE are natural stone choices that require similar cleaning and maintenance than marble (although they both better resist heat damage).

Related: 4 Tips on Choosing Fixture Finishes
 

 2. Clean Smart

The easiest, safest, and most effective cleaning method for your kitchen counters is warm dish soap + warm water, says Baker. A bit of mild soap in a sink works great for everyday cleaning. If you prefer the spray-on/wipe-off method, mix water and dish soap in a spray bottle. Spray on your counters, wipe with hot, wet dish cloth and dry with a towel. (See recipe here) You can also buy specially formulated sprays for your type of stone, just be sure it’s pH neutral, she warns.
 
If you have marble, wipe up spills as soon as they occur to minimize etching and avoid citrus scented cleaners because of the acidity. Other surfaces such as granite can handle stronger cleaners, but never use bleach on quartz.
 

3. Watch overspray

If you have marble or another natural stone, be careful of the overspray from sink bowl or glass cleaners. Spray those cleaners directly on your rag or sponge, away from your countertop.

Related: How to Choose Tile for Your Home 
 

4. Remove etches or scuffs

Many people will tell you etches are a part of life with marble. While everyone differs on their tolerance for countertop imperfections, it’s a myth that your only option is to suck it up and live with it. “A stone professional is your best bet for removing any type of damage, but there are some DIY methods for minor issues like etching or scuff marks,” says Baker. “There are products available called water ring and etch removers that you can use with a white nylon scouring pad to buff out any light etching. It just takes patience and a little elbow grease.”

WE HOPE THESE IDEAS AND TIPS ARE INSPIRATIONAL. PLEASE CALL ME WITH ANY OF YOUR HOME BUYING OR SELLING NEEDS AND QUESTIONS. (423-421-9192)

Gail-Jenkins.png

5 Ways to Make Your Housewarming a Hit

The boxes are unpacked (mostly) and the mail in the box reads your name. You’re officially moved in. But a house really isn’t a home until you’ve christened the kitchen with your first party. (Because let’s face it, there’s no better motivation for getting your act together).

Call up your neighbors and friends. These 5 simple tips from Tamara Dillard at Sophie’s Shoppe will have you hosting your first housewarming party without breaking a sweat.

1.    Chalk it Up

Create a warm welcome at your door with a handwritten note on a chalkboard, like this one. Larger boards are also great for front door holiday messages, while smaller ones on the table can help identify dips or cheeses. If you don’t like the dust, opt for chalkboard markers, which are found in the office or stationery aisles of most stores.


2.    Let There Be Light

A party without candles is like cheese without crackers. Their soft light creates ambiance and scented varieties can be party aromatherapy. Just be sure to skip strong scents around the food table, and elevate them if you’re expecting little people. Remember to also periodically check the ones you leave burning in other rooms, like bathrooms. Remember it’s a house warming you're after….not house fire.

Related: 5 Ways to Organize Your Guest Room and Welcome Your Visitors

3.    Pick the Perfect Cocktail

The options are endless but finding the perfect cocktail can be quick and easy. Books like Cocktails for a Crowd offer great suggestions of large-batch drinks such as the Tipsy Palmer:

6 ½ cups of hot water
10 orange tea bags
4 ½ cups of sweet tea vodka
2 cups of freshly squeezed lemon juice
1 cup of Mint Simple Syrup
Fresh Mint + Lemons for garnish

4.    Set the Night to Music

Every party needs great music and that no longer means stressing over playlists. Spotify is the perfect go-to for commercial-free music to suit most tastes. Some of Dillard’s favorite stations include Norah Jones, Leon Bridges and Lake Street Drive.
 

5.    Let Them Eat Dips

Everyone needs a few go-to recipes in their entertaining repertoire (we know you can do better than store-bought hummus). Dillard recommends the Skinny Dips Cookbook for 60 guilt-free, fresh dips as well as crispy dippers to eat them with. One of her favorites is the Parmesan Spinach Dip:

½ small white onion, chopped
1 clove of garlic, smashed
1 tablespoon of lemon juice
10 ounces of spinach
½ cup of mayonnaise
½ cup of sour cream
½ cup of parmesan cheese
1 teaspoon of salt
Mix all together in a food processor and enjoy!

WE HOPE THESE IDEAS AND TIPS ARE INSPIRATIONAL. PLEASE CALL ME WITH ANY OF YOUR HOME BUYING OR SELLING NEEDS AND QUESTIONS. (423-421-9192)

Gail-Jenkins.png

5 Ways to Make Your New Home Your Own

Whether you’ve chosen a diamond in the rough or a move-in ready house, personalizing your new space will make it feel like home faster. We sat down with interior designer Hannon Kirk Doody of Hannon Douglas for her 5 simple steps for making your new home your own.

1.    PAINT

If remodeling isn’t in your budget, consider the transformative power of paint. Paint is the quickest and most cost effective way to start fresh, says Hannon. Painting a room white creates a blank canvas to highlight your furniture and fixtures, while a bold color can completely change the dimension of a room. She suggests an eggshell finish on walls to help hide those bumps and bruises that come with the wear of an older house.

2.    LIGHTING

If your new space is looking dated, come to the light. Light fixtures define a home’s style more than you may realize. One easy upgrade is the dining room chandelier, which is a simple switch for any electrician (or a handyman could handle for less money). Just be aware of proportions. “A mistake we see often is when the scale of the fixture is off— in this case bigger is better,” says Hannon.

Related: 5 Ways to Hang Art Like a Pro

3.    CARPET

It’s hard to make a fresh start with stains. More times than not when moving into a new home there is carpet in bedrooms that needs to be ripped out and replaced. “We recommend going back with a solid, low pile, neutral,” says Hannon. “We also encourage our clients to add hardwood when able because the life expectancy is much longer and provides a greater value to the home.”

4.    CABINET HARDWARE

Changing cabinet hardware in your kitchen or bath is a DIY project almost any homeowner can handle. Brass is back in a big way, and this is a fun way to incorporate it in your new home. Don’t worry if you have a stainless or nickel faucet; we love the look of mixed metals,” says Hannon.

Related: 5 Ways to Make Your Housewarming a Hit

5.    LANDSCAPING

Your yard is your home’s first impression – gnarly bushes and weedy flowerbeds don’t make a good one. “Landscaping is very important because it’s the finishing touch that makes the home feel complete,” says Hannon. “Clean out old garden beds, put in new pine straw, and plant flowers that you love to see every day.”

Related: 5 Tips for a Beautiful Lawn

WE HOPE THESE IDEAS AND TIPS ARE INSPIRATIONAL. PLEASE CALL ME WITH ANY OF YOUR HOME BUYING OR SELLING NEEDS AND QUESTIONS. (423-421-9192)

Gail-Jenkins.png

4 Tips on Choosing Fixture Finishes

If you’ve never renovated a kitchen or bathroom, you probably haven’t lost sleep over the benefits of satin brass vs stain bronze. It may seem like minutiae, but coordinating hardware finishes can be a real headache in “heavy metal” rooms like bathrooms and kitchens. Door knobs, drawer pulls, light fixtures, even mirror finishes must all coordinate. And they’re called “fixtures” for a reason – these semi-permanent decisions are something you’ll want to love for years to come.

If fixture finishes have your head spinning, relax. Interior designer Michelle Workman has the answer – mix metals. When done properly, it can create a balance in your interior that will feel natural and storied, she says. Here are 4 tips on mixing metals like a pro.

1. Consider both warm and cool tones

Don’t paint yourself into a corner. Not only can you mix metals within one room, but every fixture in your new bathroom doesn’t have to perfectly coordinate with the rest of your home. Mixing metals allows you to experiment with the tonal qualities of metals (polished vs matte) and the feeling one gets from using a cool (silver toned) or warm (gold or copper toned) metal, says Workman.

Related: How to Choose Tile for Your Home

2. Practice restraint

Don’t mix more than three metals in one space. In a recent kitchen (top picture) Workman used brass and stainless, with a pop of copper to create more depth to the color story, she says. The La Cornue stove, which has both brass and stainless elements serves as the focal point of the room, with the pots above being the only place she used copper. This kept it from becoming “visually erratic,” she says. The brass hardware adds warmth to the cool toned cabinetry, carrying the cool/warm mixture throughout the space. 

3. Keep a theme

Don’t mix more than three metals in one space. In a recent kitchen (top picture) Workman used brass and stainless, with a pop of copper to create more depth to the color story, she says. The La Cornue stove, which has both brass and stainless elements serves as the focal point of the room, with the pots above being the only place she used copper. This kept it from becoming “visually erratic,” she says. The brass hardware adds warmth to the cool toned cabinetry, carrying the cool/warm mixture throughout the space.

Related: 5 Mistakes People Make When Remodeling a Kitchen

4. Try a little at a time

If mixing metals scares you, try a little bit at a time. In this kitchen Workman again used a La Cornue stove with brass and stainless mixed together, but the rest of the metals were kept in silver tones. She mixed both polished nickel and brushed stainless steel to keep it visually interesting.

WE HOPE THESE IDEAS AND TIPS ARE INSPIRATIONAL. PLEASE CALL ME WITH ANY OF YOUR HOME BUYING OR SELLING NEEDS AND QUESTIONS. (423-421-9192) 

Gail-Jenkins.png